
DISCOVERING ROBLOX
In this lesson, you will learn how to build an obstacle-based jumping game in Roblox Studio. You will create platforms that the player must jump across to reach the final destination, and if a jump is missed, the player will fall into space. This lesson introduces core world-building skills such as adding parts, shaping obstacles, and customizing how your game environment looks and behaves.
Overview
Topics Introduced
- Starting a new Roblox project and removing the baseplate
- Exploring and using the Explorer and Properties panels
- Creating a spawn location
- Adding, moving, scaling, rotating, and duplicating parts
- Customizing parts with color, material, Anchored, and CanCollide
- Playtesting a game
- Saving a Roblox project
Topics in Detail
1. What is Starting a New Project & Removing the Baseplate?
Starting a new project is the process of creating a fresh workspace where your game will be built. Roblox provides a Baseplate template by default, but removing the baseplate allows you to create a game where the player must stay on obstacles, or else they fall into space. This teaches you how to control the structure of your world and remove elements you don’t need.
2. What is the Explorer Panel?
The Explorer panel is a complete list of everything inside your game—parts, spawn points, models, lights, and more. It helps you select, organize, and delete objects easily. When you expand “Workspace,” you can see all objects placed in your scene. Understanding this panel helps you manage your game world effectively.
3. What is a Spawn Location?
A spawn location is a point where the player appears when the game starts. Adding a spawn location allows you to decide where the game begins. This helps you learn how to control player entry and restart positions in your world.
4. What Are Parts & How Do You Transform Them?
Parts are basic 3D building blocks in Roblox Studio. You can move them using arrows, scale them using circles, and rotate them to create different shapes and angles. These transformations help you build obstacles, platforms, and structures needed for gameplay.
5. What Is Customizing Parts? (Color, Material, Anchored, CanCollide)
Customizing parts means changing how they look and behave.
- Color changes the part’s appearance.
- Material adjusts texture (like metal, wood, or neon).
- Anchored makes sure the part stays in place.
- CanCollide allows the player to stand on it.
These customizations help you design visually appealing and functional obstacles.
6. What Is Playtesting?
Playtesting is checking your game by playing it from the player’s point of view. You use the Play button to spawn your avatar and test whether your obstacles work as intended. It helps you find mistakes, adjust difficulty, and improve gameplay.
7. What Is Saving Your Project?
Saving your project stores your work so nothing gets lost. “Save to File As” creates a file on your computer with all your progress. This helps you continue your project later without losing anything.
Activity 1
Title: Blocker game – I
Short description: In this activity, students will learn how to change properties like color, texture, and size. They will practice how to add parts, spawn location, duplicate, rotate, and move a part.
Topics Covered:
- Choose a Baseplate Roblox Template
- Learn how to use Roblox Engine
- Scene View
- Explorer
- Properties
- Toolbox
- Playtest
BUILDING A GAME
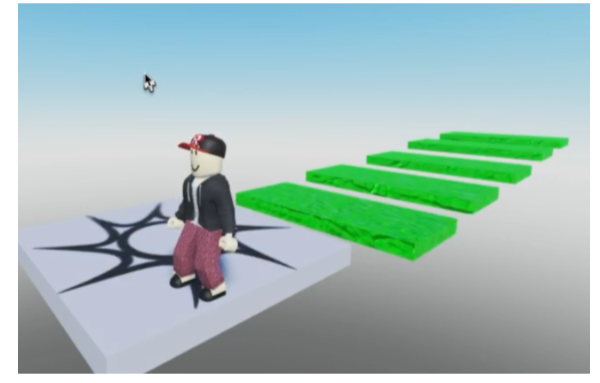
In this lesson, we will build a game with 7 obstacles. The player will have to jump from one obstacle to the other to reach the final location. If a player fails to jump on the obstacle, it will fall down into space.
STARTING A NEW PROJECT
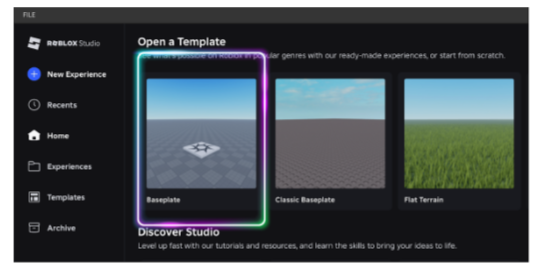
To create a new project, simply click the New button on the top left.
And then select the option Baseplate.
As the next step, we delete the baseplate since we want the player to fall off the obstacle and not land on any base. To do that, we go to the explorer panel.
EXPLORING THE EXPLORER PANEL
Explorer panel shows us the list of all the elements added to our scene. It usually appears on the left corner of the screen.
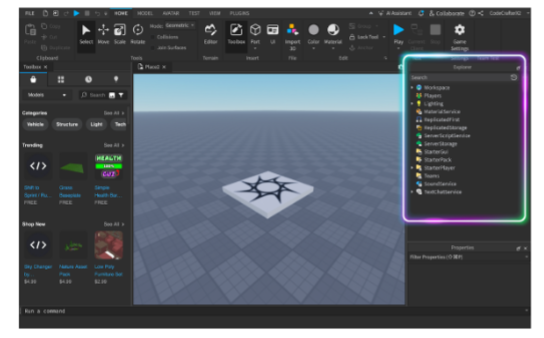
In case you’re unable to see the panel, go to the View option on top left and then click the option Explorer.
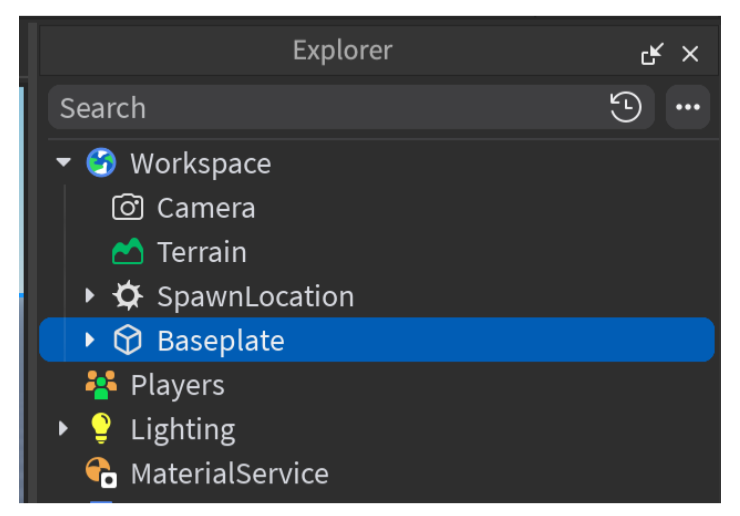
In the panel, click the small arrow on the left of the text ‘Workspace.’
Click on the baseplate to select it and then press delete.
ADDING A SPAWN LOCATION
Once the baseplate is deleted, we will need to create a spawn location.
A spawn location is a point from where the player starts or restarts playing the game.
To create a spawn location, go to the explorer panel. Click the addition sign in front of the workspace and select Spawn Location.
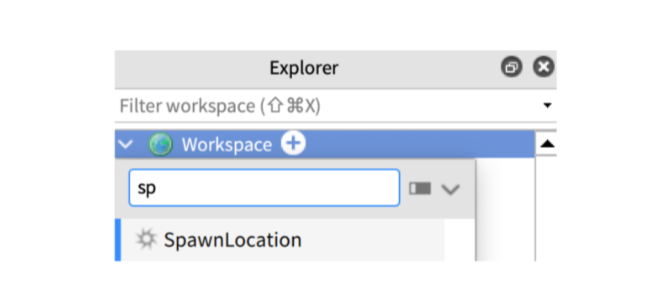
Look! Now we have a place from where the player will start.

BUILDING OBSTACLES
Now that the starting point is fixed, let’s move on to building obstacles.
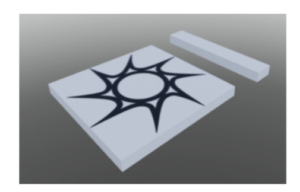
In order to do that, we will need to add a part to the scene.
A part is a basic building block in Roblox. In our game, every obstacle will be a part.
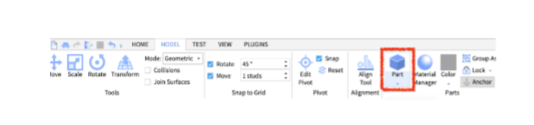
To add a part, click on the Model option from the top panel and then select Part.
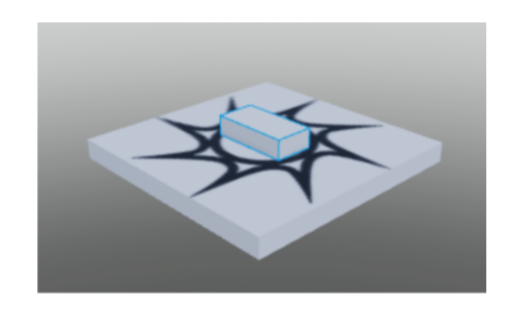
The part, by default, will appear on the baseplate like this –
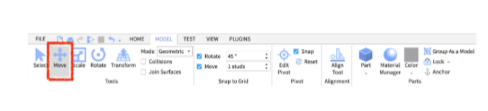
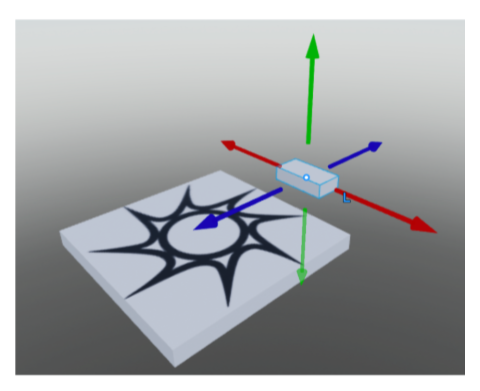
To move the part, click on the part and then click on the Move option on the top left.
In case you can’t find the move option, click on the Model option from the top panel, and then you’ll be able to access the move option on the top left.
Once clicked, these arrows will appear on the selected part –
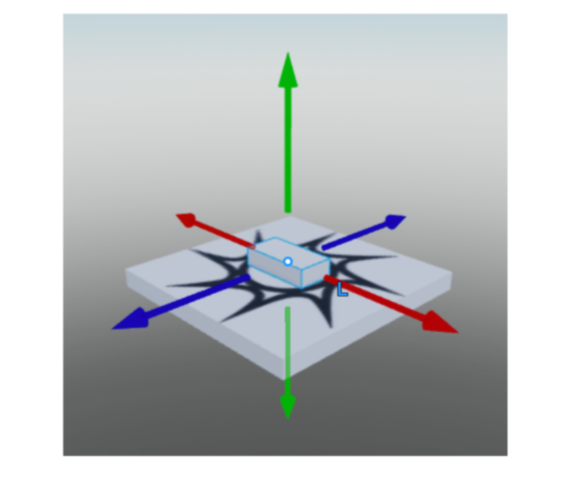
- The green arrows signify top and bottom
- The blue arrows signify left and right
- The red arrow signifies front and back.
Click on the arrowheads and drag to place the obstacles in the required position.
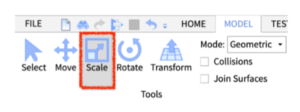
To scale the part to the required shape, click on the part and then click on the scale option.
Once clicked, these circles will appear around the part:
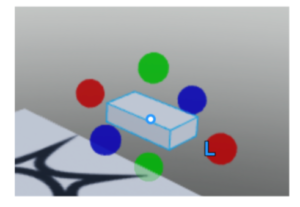
- The green circles are to stretch the part from the top or the bottom
- The blue circles are to stretch the part from left to right
- The red circles are to stretch the part from the front or the back
Once the required shape is achieved, it’s time to change the look of the part.
We can play around with multiple things, like the color and material of the part.
To do that, select the part and then click on the property window.
In case the property window is not visible, click on the View option at the top and then select.
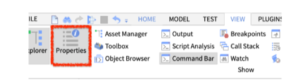
Once clicked, the property window will appear on the bottom right of the screen.
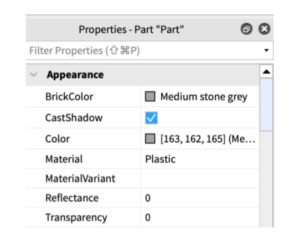
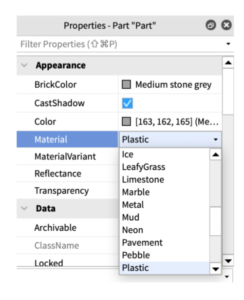
Note: First things first, make sure to click the checkbox in front of the anchored and lock property. If forgotten, your parts might float around in space and will not be there in the required position. Make sure to do this for every part you make.
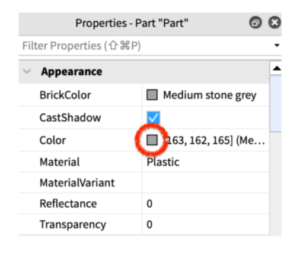
Here, you can click on the rectangle in front of the color option and play around.
You can also click on the word ‘Plastic,’ i.e., the default material, and change that as well.
Go ahead and add your own obstacles. You can play around with positioning, rotation, scale, colors, and material!
We have tried to make an obby here and made sure it’s placed like steps – one higher than the other. This will help increase the difficulty level.
PLAY YOUR GAME
Now comes the fun part! Testing out your own game! In Roblox, its called playtesting.
To playtest your game, click on this option on the top left corner of the screen.
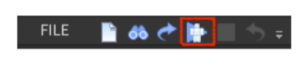
As you click it, you will see your avatar standing on the spawn location, ready to play.
Once testing is done, you can click the stop button to resume designing the game and fixing elements that are not working out.
![]()
SAVE THE PLAYER! SAVE THE GAME!
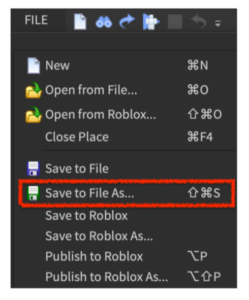
Do not forget to save your file before closing the Roblox project.
To save, go to File option and click Save to File As.
Choose the desired location of the document and press SAVE.
Outcome
Learning Outcomes for Discovering Roblox
- Understood how to start a Roblox project and remove the baseplate to create a customized environment.
- Learned to navigate the Explorer and Properties panels to manage scene elements.
- Created a spawn location and built obstacles using part creation, movement, and scaling tools.
- Applied colors, materials, and physics properties such as Anchored and CanCollide to customize parts.
- Playtested and saved the project to review gameplay and preserve progress.