
CREATING A USER INTERFACE IN ROBLOX
In this lesson, you will learn how to design a main menu and an in-game menu using Roblox Studio’s UI tools. You will add buttons like Play and Settings, customize their look, and write Lua scripts to make menus open, close, and react to clicks. This lesson introduces how user interfaces control the player’s experience both before and during gameplay.
Overview
Topics Introduced
- Creating main menus using ScreenGUI and Frames
- Adding and styling text labels and buttons
- Scripting button interactions with MouseButton events
- Controlling frame visibility through scripts
- Structuring GUI layers for navigation
Topics in Detail
1. What Is a Main Menu in Roblox?
A main menu is the first screen players see before starting a game. You learn how to create this menu using ScreenGUI and Frames, and how to design it with background colors, titles, and buttons. The main menu helps players choose options like Play or Settings, so it becomes an important part of your game’s overall user experience.
2. What Are Text Labels and Buttons?
Text Labels display written information such as the name of the game, while Text Buttons allow players to interact with the menu. You learn how to add them to the screen, change their font, size, color, and borders, and position them neatly. Buttons act as interactive elements that can be clicked to trigger actions inside the game.
3. What Is Button Scripting Using Mouse Events?
Button scripting allows your UI to perform actions when clicked. You learn how MouseButton1Click detects a click and how Connect() runs a function when that click happens. This helps you make your Play button hide the menu, or your Settings button show a new window. Mouse events are the foundation for making your UI responsive and functional.
4. What Are Frames and Why Do We Use Them?
Frames are containers that hold UI elements. You use them to organize menu screens visually and logically. The Settings frame, for example, opens only when the Settings button is clicked. You learn how to toggle a frame’s Visible property to show or hide different screens, helping you control how players navigate between menu pages.
5. What Is Visibility Control in GUIs?
Visibility control means turning frames and UI elements on or off during gameplay. By changing the Visible property through scripts, you learn how to hide the main menu, show the settings window, or bring back in-game buttons. This helps you manage menu transitions smoothly and cleanly.
6. What Is a Plugin?
A plugin is an add-on tool that we install inside Roblox Studio. Plugins can help with building, designing UI, scaling objects, and fixing layout issues. Many professional Roblox developers use plugins to save time and avoid mistakes.
Activity 1
Title: WHAT’S IN THE MENU?
Short description: In this activity, students will learn how to create a menu which appears at the beginning of the game.
Step By Step Activity Explanation
CREATING THE MAIN MENU
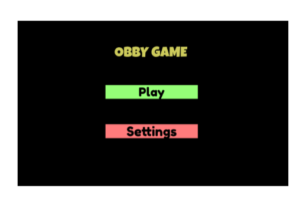
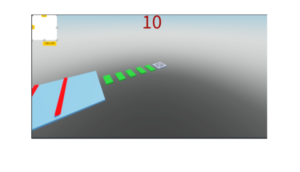
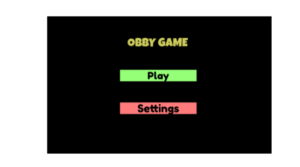
Creating a main menu is very easy! We will be aiming to make something like this:
Let’s start by opening the activity file for the previous lesson. We will add a main menu to that.
Once the file is opened, go to the explorer and select StarterGUI.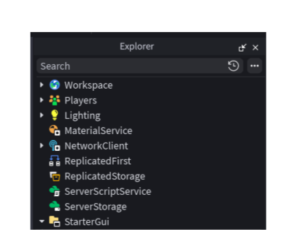
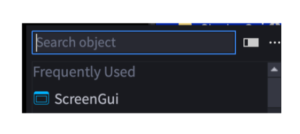
Click the + sign and select ScreenGUI now.
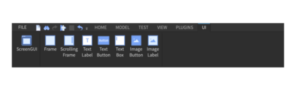
Once you add it to our game, you see the following toolbar on the top of your screen.
Time to play!
Let’s start by adding a bg to our main menu i.e. Frame. Click on the Frame button from the tool box. (Make sure ScreenGUI is selected in the explorer before clicking on the frame button) A frame will appear on the screen. Resize it to fit the screen.
Now, we’ll choose the color of the frame. For doing that, select the frame and go to its property window. Click on the color option and select from a wide range of colors.
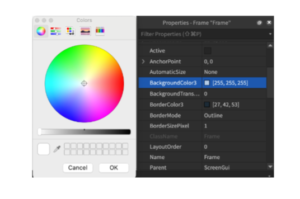
Once selected, the frame color will change.
Next up, we’ll add the name of the game. I have named the game the OBBY GAME. What will you name it?
To add the game text, first, make sure your frame is selected. Then from the UI toolbar above, click the option ‘Text Label’.
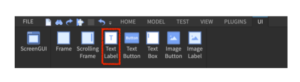
Once you click it, a text box will appear on the screen.
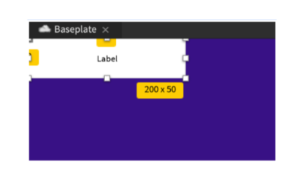
Place the label on the desired position.
To change the text in the textbox, double click on the text ‘Label’. Remove the text and type your own.

Now to increase the text size, go to the property window of the text box and click on ‘TextSize’.
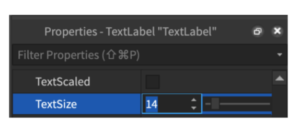
Click on the box behind the text to re-scale it to fit the text comfortably.
Next up, we’ll change the font of the text by going to the property window and clicking on the FontFace option.
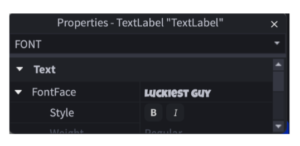
You can choose a font of your own choice.
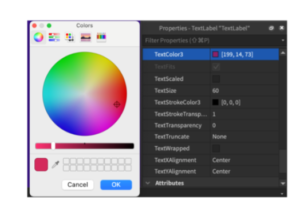
To change the text color, from the property window, click on the TextColor3 option.
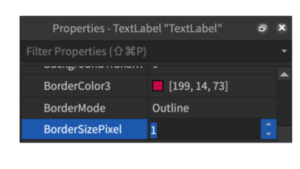
If you want to add boundary of the box, we need to add a stroke around it. To do so, go to the property box and select BorderColor3.
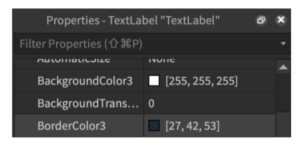
Choose your color and apply.
Since we changed the border color but it’s not really visible, we’ll go ahead and increase the stroke size of the border. To do so, go to the property window and select BorderSizePixel and then increase it.
Our title of the game is made and it looks awesome!
As the next step, we’ll add two buttons to the screen:
- PLAY
- SETTINGS
To do so, select ScreenGUI from the explorer and then add Text Button. Go ahead and change the text, font type, font size, font color, textbox color, textbox boundary, stroke size and positioning.
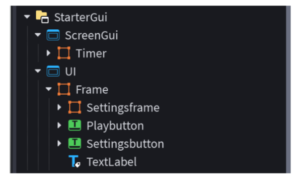
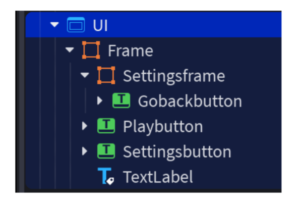
Note: Make sure to rename your buttons and title in the explorer window to avoid confusion later.
Great! We are now done designing the main menu screen. The next step is to make the menu workable i.e. when the buttons are clicked, an action should take place and we will define it through coding! Let’s go!
PLAY BUTTON FUNCTIONALITY:
Go to the play button in the explorer window and click the + sign in front of it. Choose the script option.

Delete the default text that appears in the script.
As the gamer clicks on the Play button, we need the game to start. In order to do this, we’ll first track the Click activity by using the default code script.Parent.MouseButtonClick1. Once the button is clicked, we’ll need to call a function to get the gamer to play the game. So we’ll use Connect to link the action of Clicking to the reaction function().
Copy paste the following code:
script.Parent.MouseButton1Click:Connect(function()
end)

Next, we’ll define the function. Once the gamer clicks the Play button, we want the main menu to disappear so that the game becomes visible.
To make that happen, copy paste the following code:
script.Parent.Parent.Visible = false

And there you go! Your Play button is set to be used.
SETTINGS BUTTON FUNCTIONALITY:
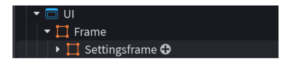
To code the setting button, we will first make a setting window frame which will open once the setting button is clicked.
To do so, go to the explorer and click on the + button in front of the frame. Select the option Frame from the dropdown. Rename the frame as a setting frame.
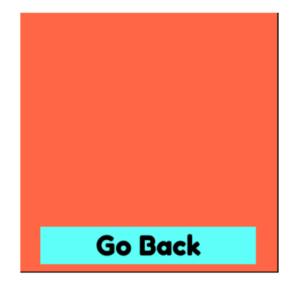
Time to design the frame. Make sure to add a button to GO BACK. The following is our version of the setting window. We are not adding anything for now. You can add a textlabel inside it.
Make sure to rename your layers inside the setting frame as well.
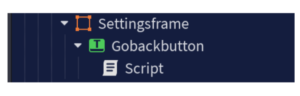
Now let’s code the BACK button first. In the explorer, click the + sign in front of the BACK button layer. Select Script.
Delete the default code.
Once the BACK button is clicked, we need the gamer to be redirected to the main menu i.e. the setting frame should disappear. Let’s code the same.
Copy paste the following code:
script.Parent.MouseButton1Click:Connect(function()
    script.Parent.Parent.Visible = false
end)

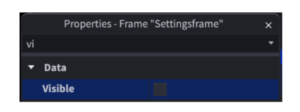
Now, since we don’t want the setting frame to be visible throughout, we will untick the checkbox in front of ‘Visible’ in the property window of SettingFrame.
Now that we’re all set with the Setting frame, time to add the code to the SETTING button of the main menu.
To do that, click the + sign in front of the Settings button in explorer and add a script. Delete the default code.
Copy paste the following code:
Please Note: Replace the SettingsFrame layer name with the name you have given to your frame.
script.Parent.MouseButton1Click:Connect(function()
    script.Parent.Parent.SettingFrame.Visible = true
end)

And we’re done! You’re all set with the main menu. Playtest to make sure the code works flawlessly.
Introducing Plugins & Using AutoScale Lite
Now that we have started designing our game scene, there is one more very important concept we need to learn — Plugins.
Plugins are special tools that help us work faster and smarter in Roblox Studio. Instead of doing everything manually, plugins can automate tasks and improve how our game looks and works.
Why Do We Need AutoScale?
Our game can be played on different screen sizes — computers, laptops, tablets, and even different monitor resolutions. If UI elements or objects are not scaled properly, they may look too big on one screen and too small on another. Sometimes they can even move out of the screen. To fix this problem, we use a plugin called AutoScale Lite.
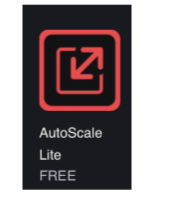
What Is AutoScale Lite?
AutoScale Lite is a plugin that helps scale UI elements correctly so they look good on all screen sizes. It automatically adjusts size and position so your game does not look broken or messy on different devices. This is very important for creating professional-looking games.
Installing AutoScale Lite
Let’s install the plugin.
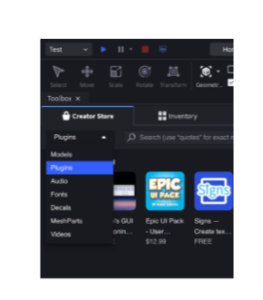
- Go to the Toolbox in Roblox Studio.
- Click on the Plugins tab inside the Toolbox.
- In the search bar, type AutoScale Lite.
- Select the plugin and click Install.
- Once installed, the plugin will appear in the Plugins toolbar at the top of Roblox Studio.
How to Use Unit Conversion for UI Scaling
To make sure your UI looks good on different screen sizes, we will use Unit Conversion and change values to Scale.
Step-by-Step Instructions
- Select a UI Element: Click on the UI element you want to adjust. This can be a Frame, Text Button, or Text Label.
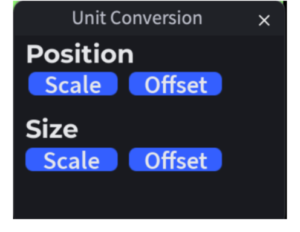
- Convert Position to Scale: In the Unit conversion, find Position. Select Scale. This ensures the UI element stays in the correct position on different screen sizes.
- Convert Size to Scale: In the Unit conversion, find Size. Select Scale. This ensures the UI element resizes properly on different devices.
- Repeat for All UI Elements: Repeat the same steps for every UI element in your game, including:
- Frames
- Buttons
- Text labels
Important Tip
Always convert both:
- Position → Scale
- Size → Scale
If only one is converted, the UI may still look incorrect on some screens.
Result
After applying Unit Conversion with Scale:
- UI elements stay aligned
- UI does not stretch or overflow
- The game looks clean and professional on all screen sizes