
ADDING TIMER
In this lesson, we will set up a timer. The player will have to finish the game within a specific time to win. If the player loses, the timer resets, and the player starts from the spawn location.
Overview
Topics Covered:
- How to add a timer to the game.
Getting Started:
Open the activity made in the previous lesson.
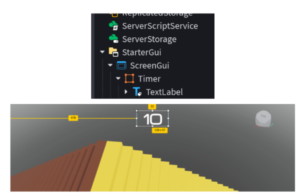
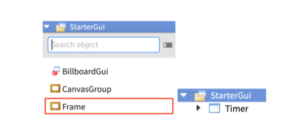
To add the timer text on the screen, we’ll go to StarterGUI in the explorer panel. We’ll add a frame to it and call it ‘Timer’.
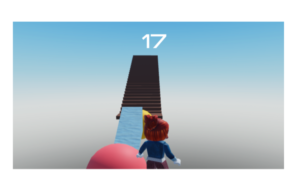
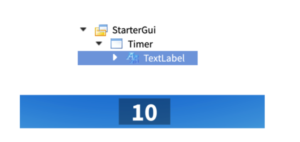
Next up, we’ll add a timer text to it. For now, let’s fix the text at 10.
Before we make the text change according to the time remaining, let’s decide when to start the timer and when to stop it.
To start the timer, the player will have to touch a specific part that will trigger the start_timer function.

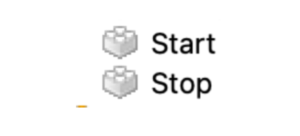
Here, we have made a part above the spawn location where the player will land every time the player starts the game. We have renamed the part as ‘Start’ in the panel and we have made the part visibility 0.
Moving to the stop part which the player will have to touch to stop the timer by revoking the stop_timer function.
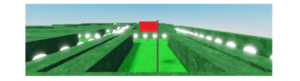
Go to the last landing part of the game and make a checkpoint. We have made a Stop part and a flag on top of it. When the player touches the stop part, the timer will stop.

Make sure to rename the part as ‘Start’ and ‘Stop’.
Now getting back to the timer text in the StarterGUI option. Hover in front of the text label and add a script to it. Delete the default code.
Step 1: Define Variables
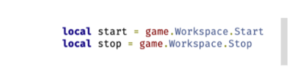
To start with, we’ll define the start and stop variables that should come from the ‘Start’ and ‘Stop’ parts of our workspace.
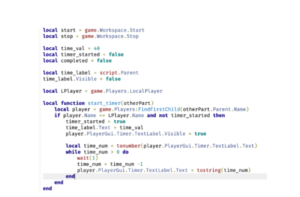
local start = game.Workspace.Start
local stop = game.Workspace.Stop
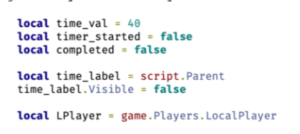
We’ll also define a variable for the timer called timer_val. We’ll set its value at 40 to make the timer countdown start from 40 seconds. You can always change it depending on the game difficulty.
local time_val = 40We’ll define two variables for timer_started and completed which will be set to false initially until a condition defines it as true.
local timer_started = false
local completed = false
A variable called time_label will be defined which will gather data from Parent i.e. Text Label. We’ll initially keep the text visibility as false until a condition arrives that changes visibility to true.
local time_label = script.Parent
time_label.Visible = false
We’ll now define a variable called LPlayer which will store the data of the player.
local LPlayer = game.Players.LocalPlayer
Step 2: Define Timer Functions
Great! Now we’re all set with the prerequisites to define our function.
We’ll aim to define two functions:
- start_timer to be called when start part is touched
- finish_timer to be called when stop part is touched
When the start part is touched, the following things should happen:
- Timer_started should become true
- The label text should be equal to Time_Val i.e. 40 defined previously
- The text label should become visible
- The timer value should decrease by 1 every second until it becomes 0
- If timer becomes 0 and the player still hasn’t reached the stop part, the player’s health should become 0
Let’s code all of this in a few simple steps:
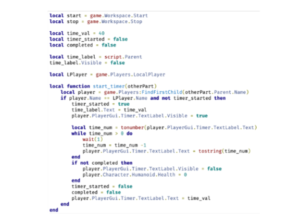
local function start_timer(otherPart)
    local player = game.Players:FindFirstChild(otherPart.Parent.Name)
    if player.Name == LPlayer.Name and not timer_started then
        timer_started = true
        time_label.Text = time_val
        player.PlayerGui.Timer.TextLabel.Visible = true
    end
end
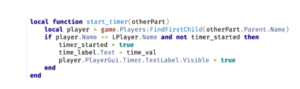
In the above code, we covered point 1, 2 and 3.
Now let’s code for point 4.
local time_num = tonumber(player.PlayerGui.Timer.TextLabel.Text)
while time_num > 0 do
    wait(1)
    time_num = time_num - 1
    player.PlayerGui.Timer.TextLabel.Text = tostring(time_num)
end
Here, as long as the value of time_num is greater than zero, the value will keep reducing by 1 every 1 second.
We use tostring to change a numerical value, in this case – time_num, to a string value for display.
Now, to code point 5, copy paste the following code:
if not completed then
    player.PlayerGui.Timer.TextLabel.Visible = false
    player.Character.Humanoid.Health = 0
end
timer_started = false
completed = false
player.PlayerGui.Timer.TextLabel.Text = time_val
Here, we have coded that if the player does not complete the task before the timer turns 0, the player dies. Post that, timer_started becomes false. Completed becomes false and the time_val value is visible in the text label.
When the player touches the stop part before timer becomes 0:
- The timer should become invisible
- Complete should become true
Let’s code that:
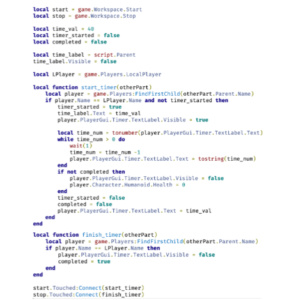
local function finish_timer(otherPart)
    local player = game.Players:FindFirstChild(otherPart.Parent.Name)
    if player.Name == LPlayer.Name then
        player.PlayerGui.Timer.TextLabel.Visible = false
        completed = true
    end
end
Step 3: Connect Functions to Parts
And we’re done! Now we’ll call the start_timer function when start part is touched and we’ll call the finish_timer function when the stop part is touched.
start.Touched:Connect(start_timer)
stop.Touched:Connect(finish_timer)
Now save and playtest the game to make sure the time given isn’t too easy or too tough. You can always change the timer value by changing time_val value.
Activity 1
Title: TICK! TOCK!
Short description: In this activity, students will learn how to set a timer for their game. As soon as the timer’s up, the game will be over.
Outcome
Learning Outcomes of Tick! Tock!
- Added a timer to the game that counts down from a set value.
- Triggered the timer to start and stop based on player actions.
- Implemented game mechanics for player health and timer reset upon timeout.
Agenda
All the element names in the code will have to be replaced with what the students have named their elements.
Make sure to reiterate how logical coding is and nothing is to be crammed.
EXTRA PROJECTS
Goal
To make a game with a timer.
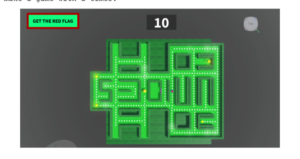
Story
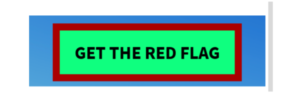
Today we’ll be making a fun maze game. The player will have to reach the red flag within 10 seconds to win.
Getting started
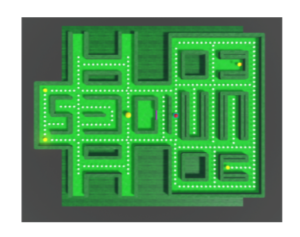
- Step 1: Let’s start by making a maze. To do that, go to the toolbox and in the ‘model’ category, search for ‘maze’
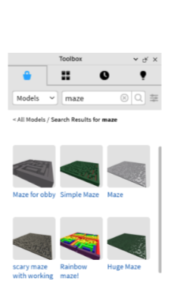
- Choose a maze of your choice and double click to add it to the scene.
- Step 2: Great! Now to finish the game, the player will have to reach a red flag so let’s add that. Go to the toolbox and search for a flag you like.
- Step 3: Now at the beginning of the game, at the spawn location, make a part. Rename it to ‘Start’ and make it invisible.

- Step 4: At the end of the game i.e. below the flag, make a part. Rename it to ‘Stop’ and make it invisible.
- Step 5: To add the timer text on the screen, we’ll go to StarterGUI in the explorer panel. We’ll add a frame to it and call it ‘Timer’.
- Next up, we’ll add a timer text to it. For now, let’s fix the text at 10.
- Step 6: We’ll add another text label to guide user on what to do to finish the game.
- Step 7: Now getting back to the timer text in the StarterGUI option. Hover in front of the text label and add a script to it. Delete the default code. Use the same code structure from the main lesson above.
- Step 8: Now save and playtest the game to make sure the time given isn’t too easy or too tough. You can always change the timer value by changing time_val value.